Share this post
Students can often feel overwhelmed by complex tasks. These are learning activities that are more difficult for a variety of reasons. For example, the activity may involve multiple stages, making the task difficult to follow. It may also require a lot of information to be processed at the same time.
A complex task could be...
- listening to a long dialogue while reading and answering comprehension questions
- reading a heavy text and categorizing the information
- working on a group project involving many stages
One of the best things about being a graphic facilitator is being able to use my skills to make learning more accessible. It’s a good way to reduce cognitive load and make difficult tasks more achievable.
Simple drawings and visuals are a great way to simplify complex tasks because they can be used to help learners interact with and process information in different ways. This in turn helps improve understanding and memory.
Let’s use this free lesson on applying for a job as an example. I’ve chosen this one since it's complex in a number of ways:
- There's a long text with comprehension questions.
- It contains a lot of new vocabulary and concepts.
- The process of applying for a job varies depending on location and industry, so this may be unfamiliar or different to some students.
Here's a quick step-by-step guide on how we're going to simplify these complex tasks for your students using visual prompts. These same steps can also be used to help you break down other types of complex tasks in future lessons.
1. Identify the key points
When we take notes or summarize information, we usually look for the most important details. The same applies when simplifying complex tasks.
Take a look through the lesson and find the key points you want your learners to focus on. If you’re doing a listening or reading activity, these may be based on the comprehension questions. For a writing task, these might be the topics you want them to cover.
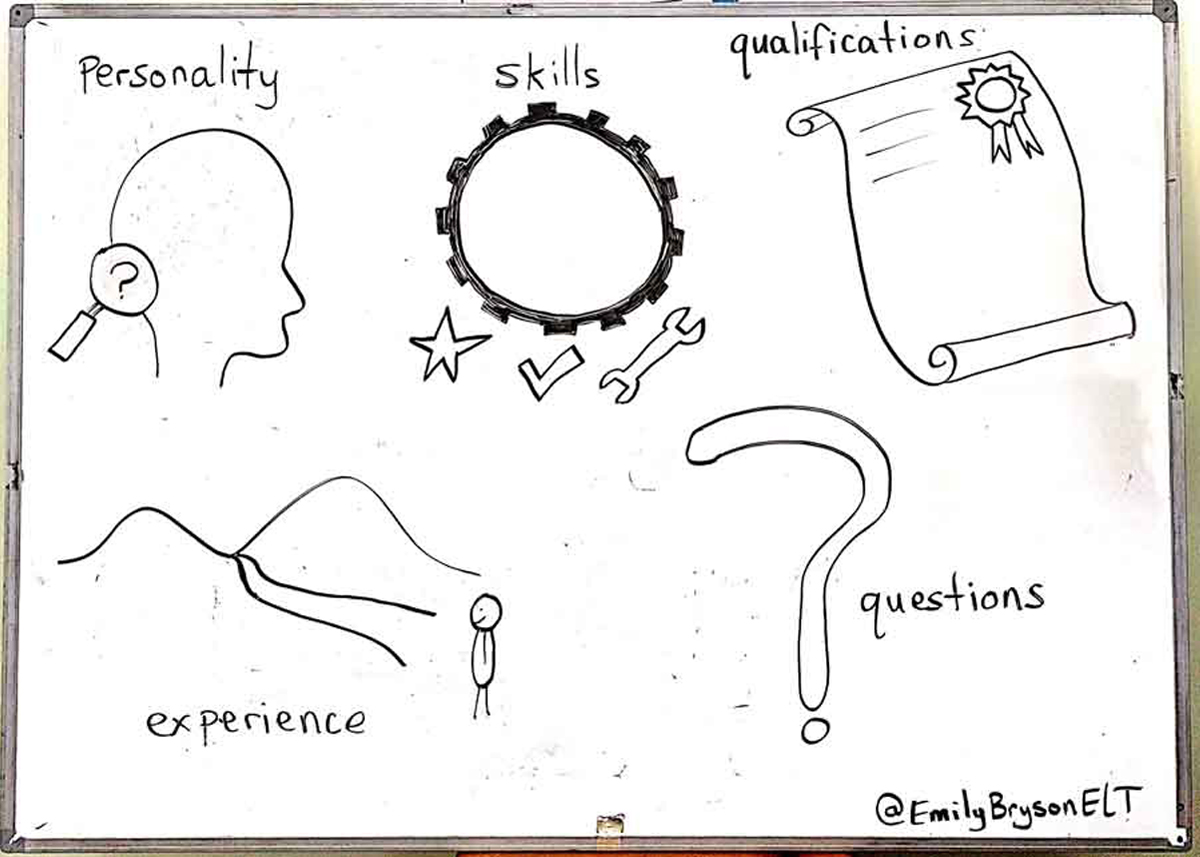
In this instance, I read through the lesson's job application letters and found the following main ideas:
- personality
- skills
- qualifications
- experience
2. Create the "containers"
In the world of graphic facilitation, containers are simple icons that can be used to "contain" ideas. For example, in this blog post, I use a thought bubble as a frame for students to add their inner thoughts.
For this lesson, I’ve drawn:
- a large head with a magnifying glass to represent personality
- a big cog and a small star, tick, and tool to represent skills
- a scroll to represent qualifications
- a road map looking backwards to represent past experiences
- an over-sized question mark to represent questions
The great thing about using containers is that they're flexible and can be used in many ways.
For example, I added the "questions" container so that students have a space to ask anything they're pondering or having difficulty with as they read. They can also use this container when preparing to write their own job application letters over email as a way to consider which questions they want to ask their teacher or potential employer.

You’ll notice that these containers are drawn on a grubby whiteboard and are by no means perfect. That’s because the purpose of using simple drawings is not artistic wizardry. It’s about communication, inspiration and activating schemata. In reality, whiteboards often need a good clean, and teachers don’t have time to create masterpieces!
If drawing isn’t for you, there's the digital option where you use stock vector graphics or create the template using online design tools, such as Canva, Jamboard, or Microsoft PowerPoint. However, this does mean that you’ll have a bit more prep to do ahead of class.
3. Add information or ideas
This is where students get to interact with the content. It's an opportunity to step away from worksheet-based questioning prompts and towards a multisensory means of learning.
There are many ways to do this:
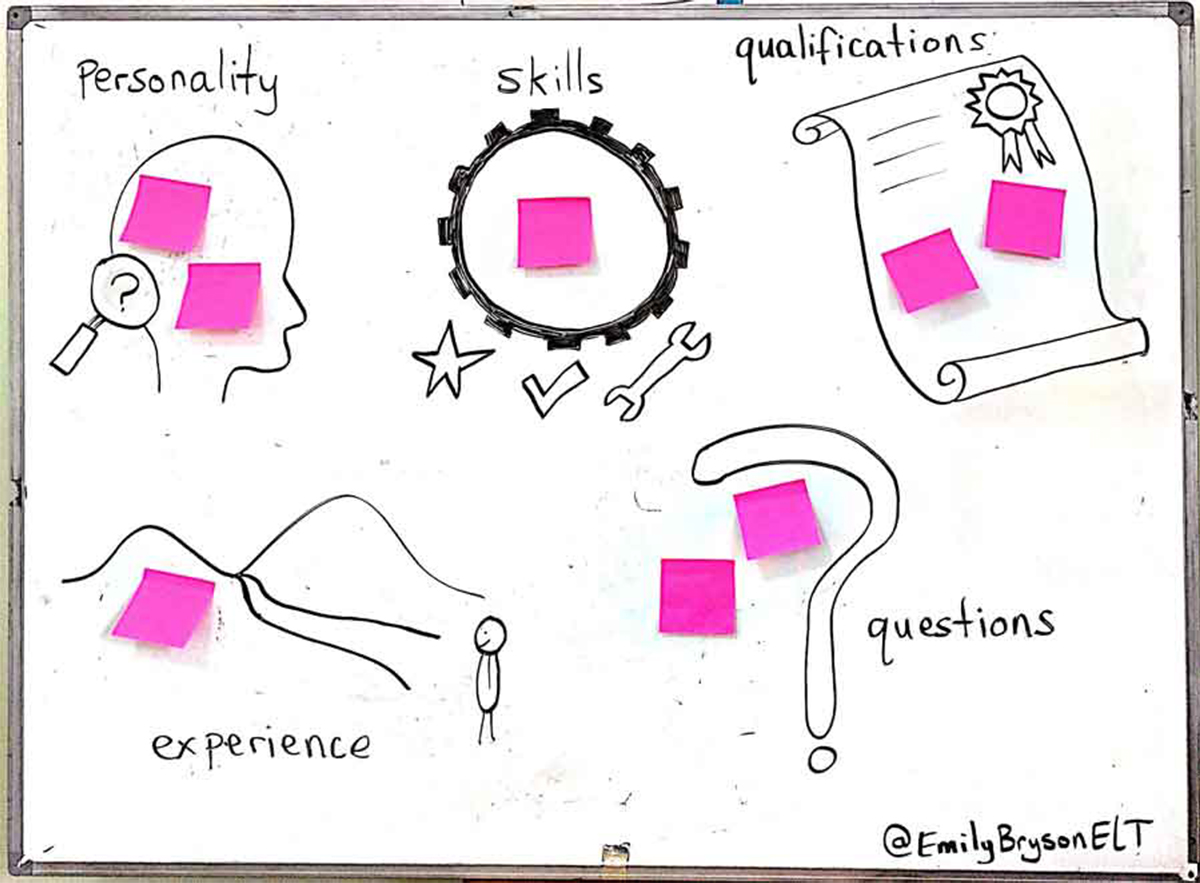
- Ask students to copy the doodles to their notebooks and complete them solo.
- Provide photocopies for students to complete.
- Use a whiteboard. Students add their ideas using sticky notes or whiteboard markers.
- Use flipchart paper. Use one sheet per container. Then pass each sheet around the groups and have students add their ideas using pens or sticky notes.

4. Exploit the content
The beauty of using containers to synthesize information in class is that you can use and reuse them for different purposes.
Reading/Listening
Ask students to read or listen to a text and complete the information. You could use containers to check for understanding. This means students can really focus on their receptive skills instead of being distracted by comprehension questions.
Speaking/Writing
Students use the containers to consider and add their own skills, experiences, personality, qualifications, and questions. They can then share their ideas, role-play interviews, or use the ideas to help them write a cover letter or personal statement.
You could also use the containers from this blog post with this lesson on interviewing for a job.
If you like this idea and would like to learn to develop your drawing skills for teaching, check out my courses.
Share your thoughts
Have you used a technique like this in class? What did you do? How did it go? We’d love to hear from you!
Related resources
Comments (1)
Jen A.(Teacher)
January 13, 2023 at 6:01 pm


